Let's build a custom TextView.
TextView is a basic android view used by developers for displaying text in their apps. Today we’re gonna give TextView some steroids :)
What we’re gonna build?
Imagine a situation where you want to show a particular length of the text to the user followed by “…show more” only if the length of the string is
greater than the maximum length of string you want to show to the user. We call it an expandable textview.
Android framework doesn’t provide any default way to do this.
There is plenty of open source libraries available for this. But why use a library when you can build it by yourself?
How we’re gonna build?
Android provides flexibility for creating your own custom component by extending any existing view or viewgroup.
So, we will build our own custom android component which will extend the TextView.
TextView provides lots of features but unfortunately, it didn’t spoon-feed everything to the developer.
Enough theory, let’s start by creating a new class in Kotlin - ExpandableTv.kt
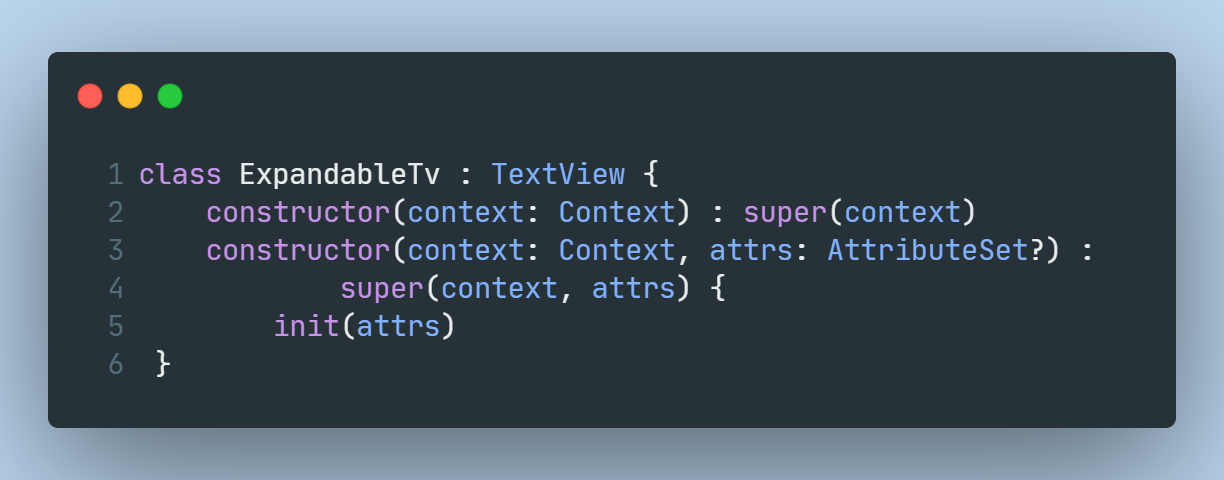
You can see there are three constructors we have implemented from the parent class. Remember if you’re implementing your own views, only the first 2 constructors should be needed and can be called by the framework. This code is very much self-explanatory. Now let’s have a look inside the init(attrs) method.
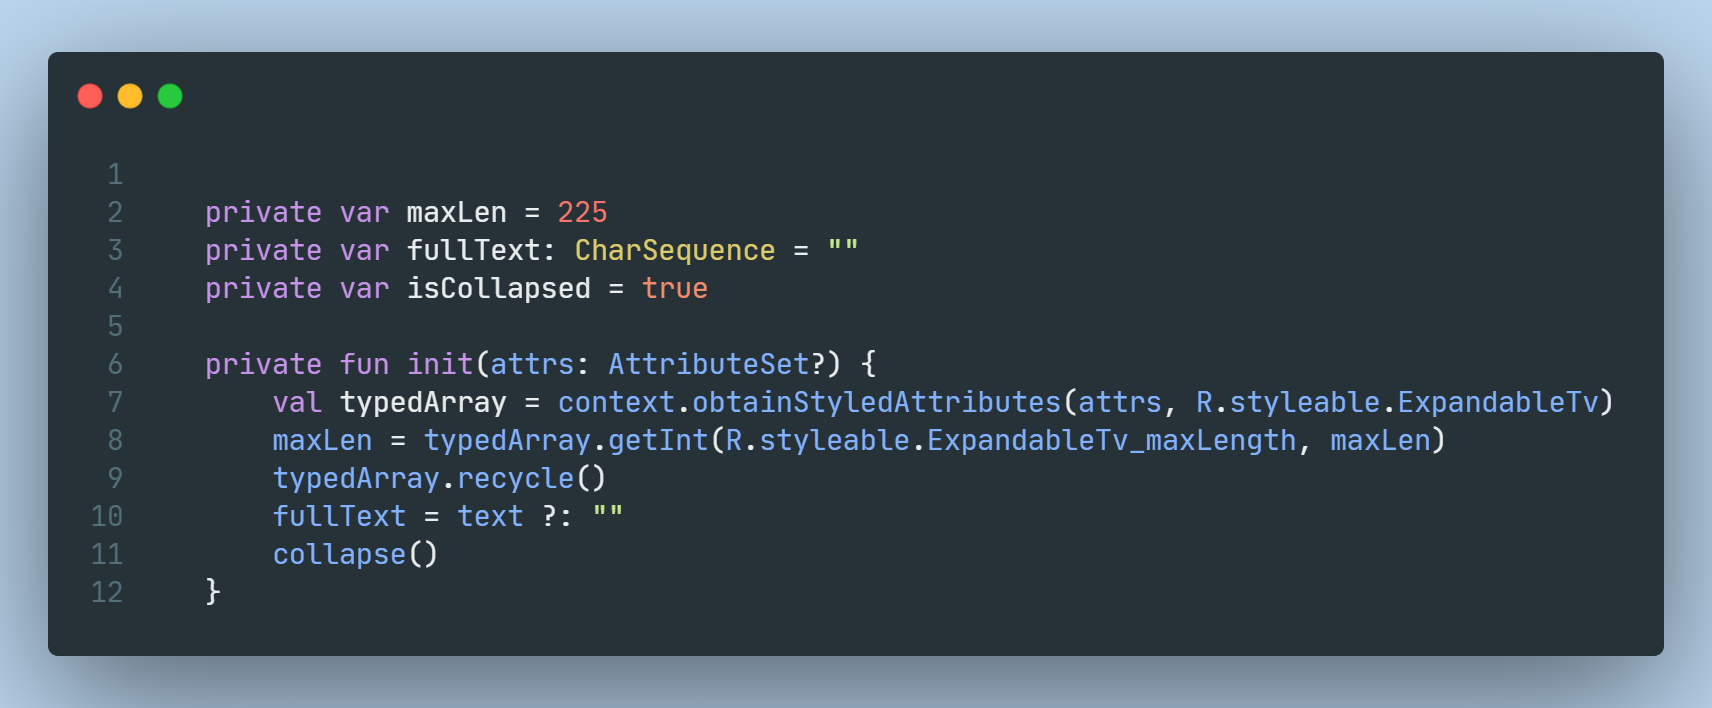
We will first declare some variables for storing and managing our collapsed and expanded text.
init(attrs) does the following operations -
- First, we will create a TypedArray instance for getting the attribute’s value defined by the user in the XML.
- From the typedArray we will get the max length defined by the programmer, if it’s not declared in the XML then we will define a default value (225).
- Then, we will assign the text which is set by the user to
fullTextfor further manipulation. - Note: you need to call the
recycle()method to release the TypedArray to be re-used by the later caller. - At last, we will call the
collapse()method to collapse the text.
Before looking at collapse() let’s see what is inside our attrs.xml file -
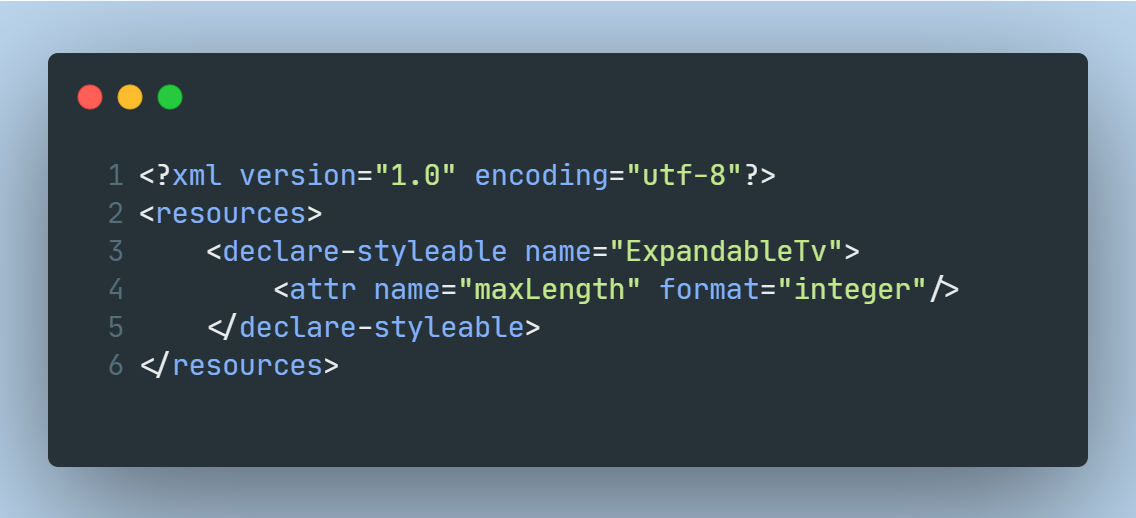
Our use case is pretty simple so we only require one attribute which is of integer type.
Next -

collapse() does the following operations -
- When collapse is called it means that the text is changed and our component needs to keep track of the state (collapsed or expanded) so we just update isCollapsed boolean.
- Then, we will check if the text which is currently passed to the textview is smaller than equal to the max length (default is 225) entered to which we have to ellipsis further text, if the condition is satisfied then we don’t have to do anything more and just set the full string to the textview else get a substring of fullText till specified max length and put “…show more” at the end.
- Note: We are directly setting the value returned from the if expression to the textview.
Almost the same logic for expand() -
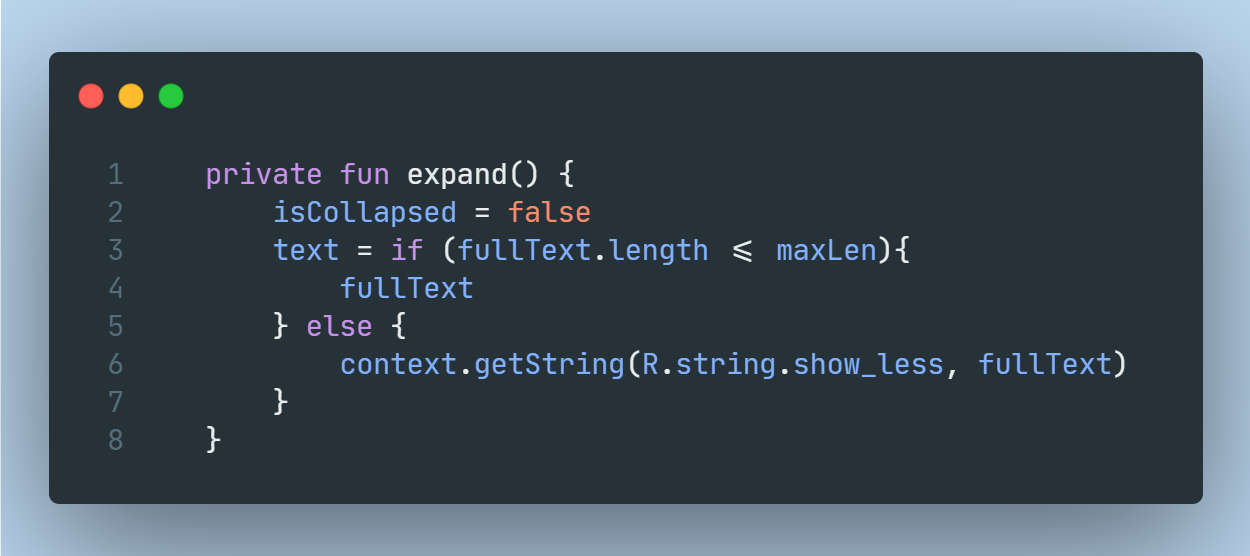
expand() does the following operations -
- We will set the isCollapsed to true to keep track of the current state.
- The rest of the code is similar to collapse, the only difference is that we need to change the string attribute and no more substrings :)
These two methods are done, so now we have to make them work together, let’s see how we will do it.
We should have one public method so we can manipulate both of these methods indirectly in our activity or fragment
For that we’ll create setExpandCollapse() -
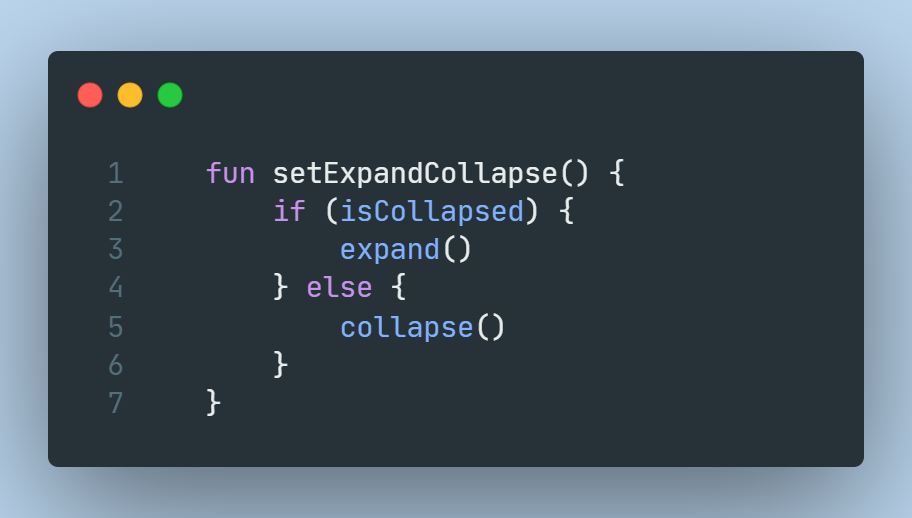
setExpandCollapse() is a very clean method that just calls one of the above methods according to the current state (isCollapsed).
After wiring everything together, your code should look something like this -
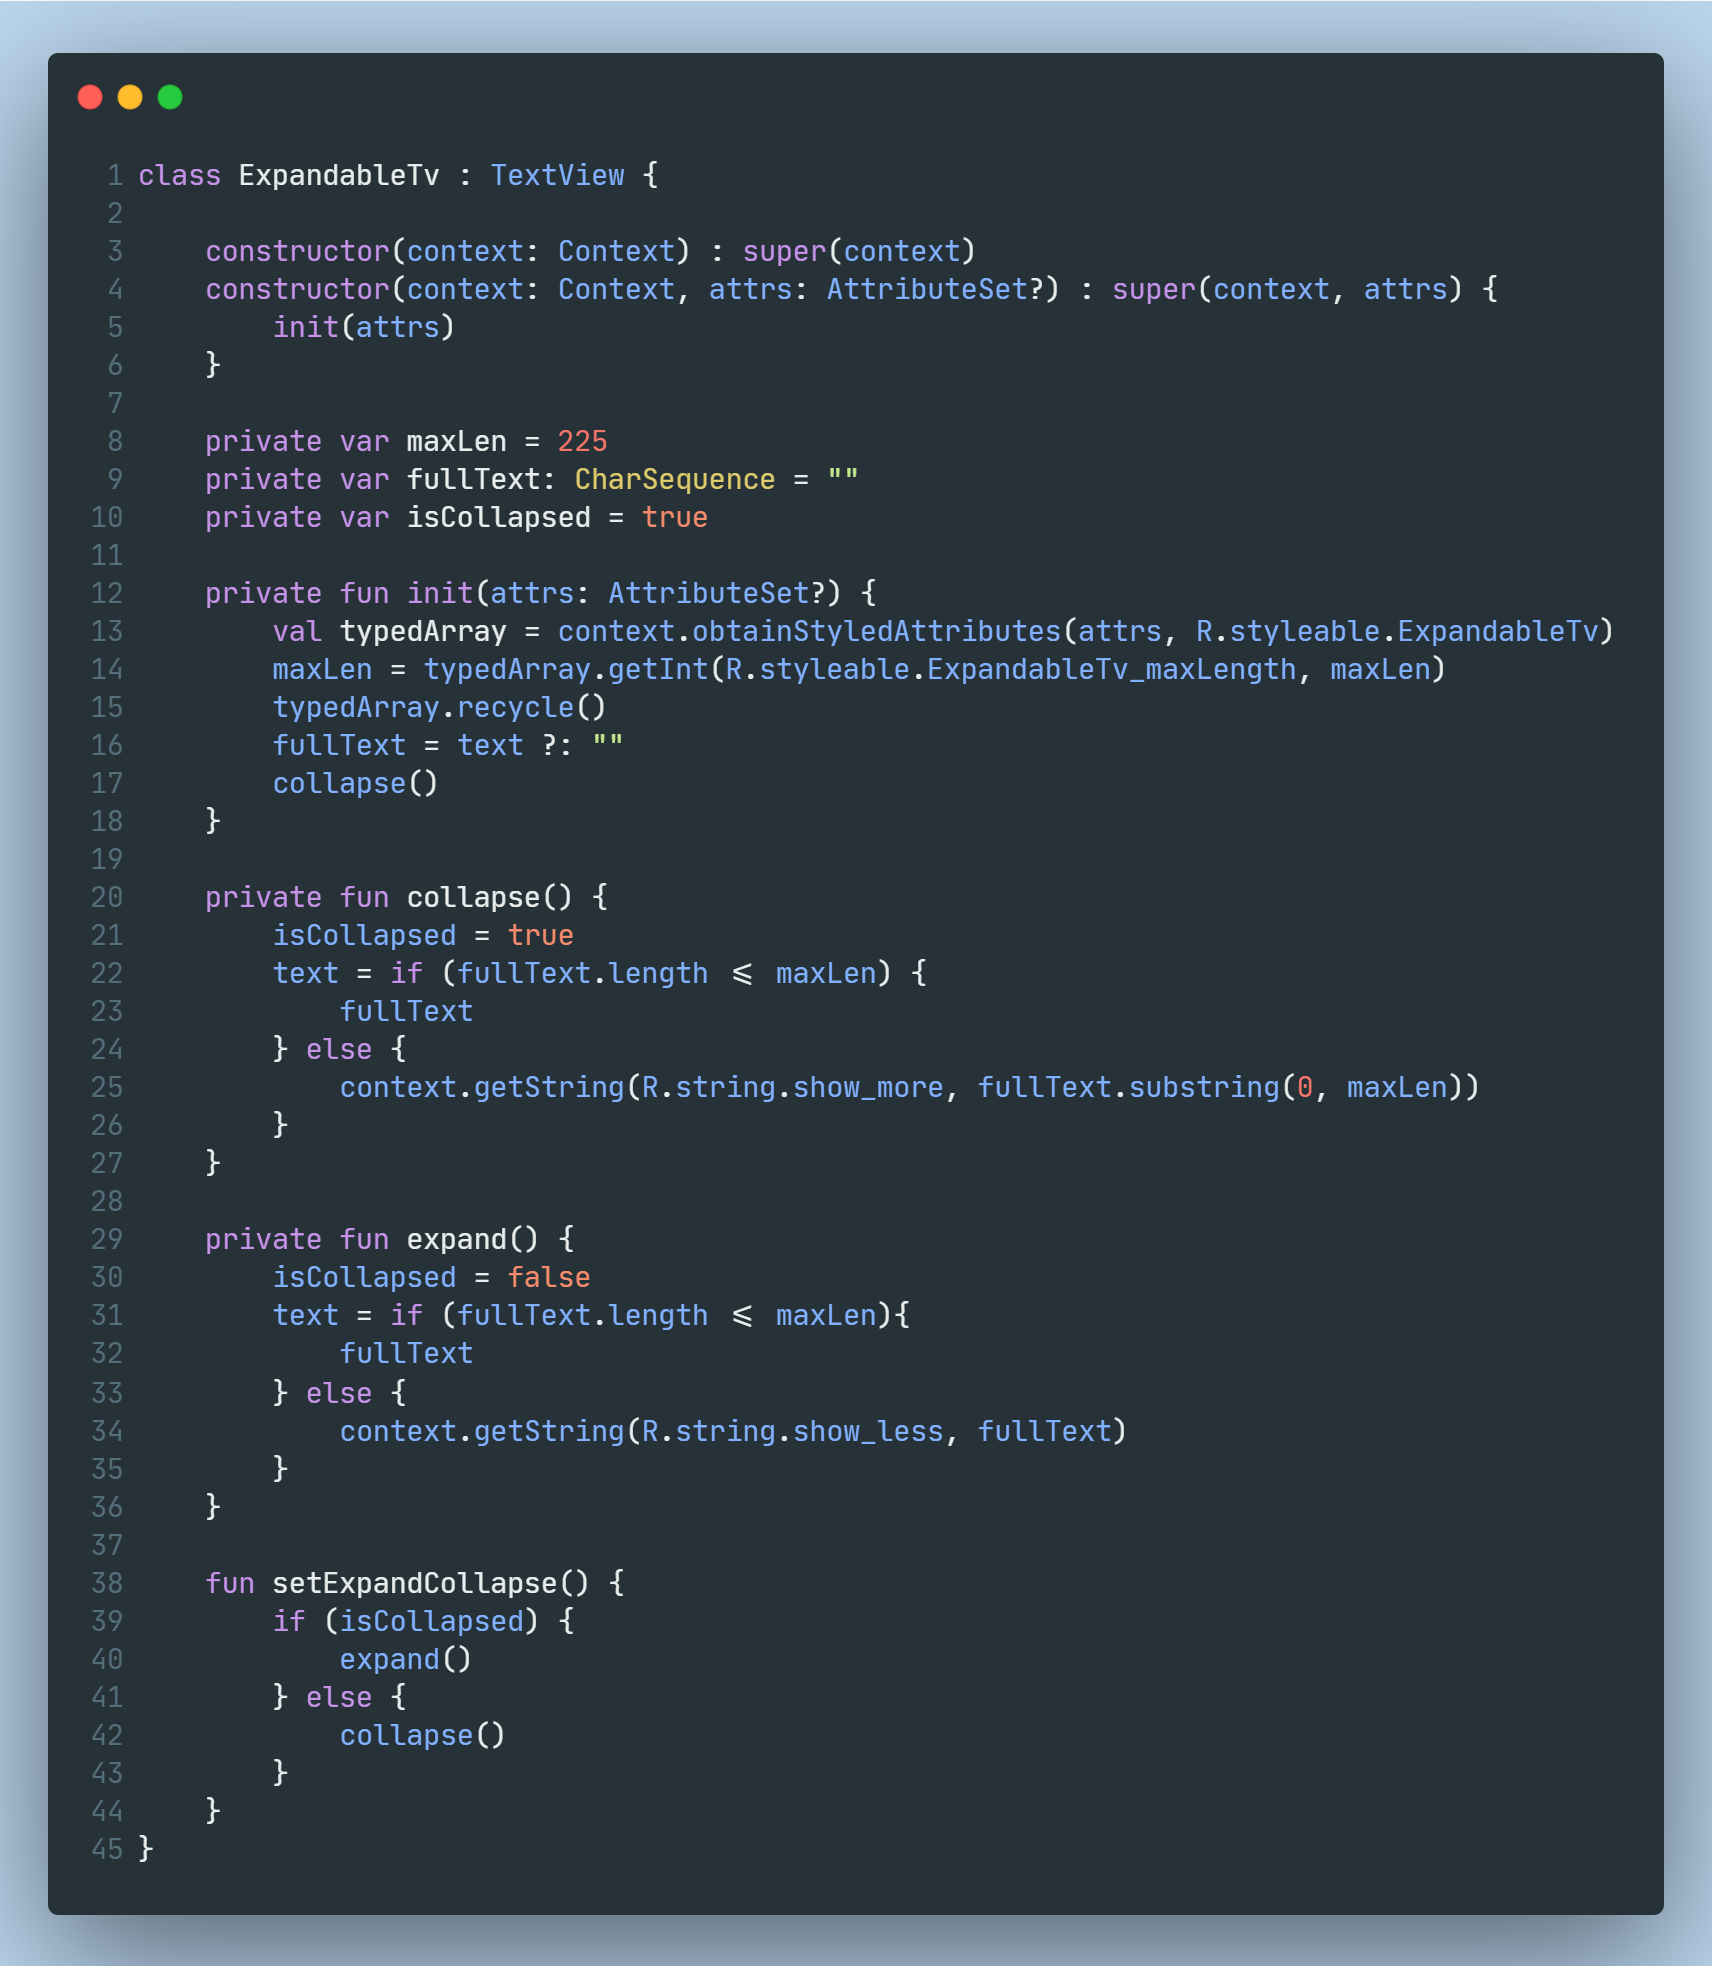
Note: We can further optimize this code but just for the sake of this example I am keeping it simple.
So with that, Everything is done on the component part, now it’s time to use our custom component inside the project. Create a new activity or use an existing one and inside the layout file declare your component like this -
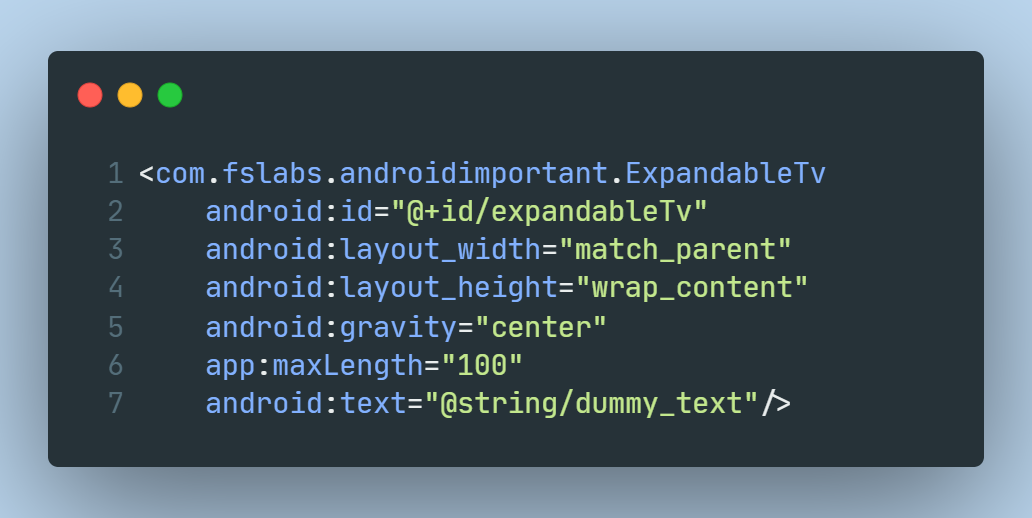
It is a simple declaration like the other components and has one extra attribute which is not present in the base TextView. app:maxLength accept an integer which will decide at what point our string is going to show ellipsis.

Finally, we’ll call the setExpandCollapse() on click of the textview.
This was a straightforward example of creating a custom component using an existing view. Although you can build some components from scratch where you have to implement onLayout(), onMeasure(), onDraw(), but for our use case, it’s not required so maybe we will learn about it next time.